How to hang a hammock

Info about hanging the hammock
On this page you will find extensive info about hanging, distances and knotting the hammock.Hanging a hammock - general
- The best position in a hammock (without a stick) is diagonal. In this way your spine is straight. For this, the hammock should hang in a banana shape, meaning the suspension points should not be too low.
- Too far apart is almost never a problem. This can be easily solved with some ropes.
- Important: experiment and see what is best for you.
- Which hooks and plugs can best be used depends on the walls, ceilings, fences etc. When in doubt, please check at a hardware store. Always make sure the suspension can bear the weight well.
Guidelines for hanging the hammock
Mounting instructions
It is best to lie diagonally in a hammock. Therefore, the hammock should not hang too tight. Use the following guidelines for hanging the hammock :- The distance between the suspension points = (length of hammock + any ropes) * 0.85
- The height of the suspension points = (length of hammock + any ropes) * 0.375.
- And especially: try what feels best.
Note:
- For a hammock stand, the "height of the suspension points" is not the distance to the ground, but to the highest point in the middle of the hammock stand.
- For the aforementioned calculated width and height of the suspension points, the middle of the hammock hangs at about 35-45 cm above the ground or the hammock stand.
- If the available width is a bit less than what is calculated above, it is generally not a problem. You solve this by making the suspension points slightly higher.
A simple knot to attach the hammock
A hammock can easily be hung with a suspension kit or a few ropes (or if the distance is right, directly on a few hooks). If you use ropes below you will find a simple knot to attach the hammock. 


- Attach the rope to a pole, tree or on a hook. So you have two equally long ends.
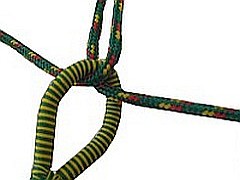
- Put the ropes on 1 side through the eyelet of the hammock. As shown in the first photo.
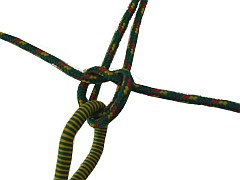
- Make a knot, as shown in the second photo.
- Pull the ends until the eyelet is at the right height.
- Ready !!!!!!!


